Beyerdynamic DT 770 M – Cable Surgery
I own a pair of DT 770 M headphones that needed fixed and were not covered by the warranty anymore. I wear them for work, at home for drumming, in the transports for protecting my ears from the noisy environment… I need them to operate correctly even though they only act as earplugs half the time. So, I cracked them open, it was the first time I ever ventured physically that deep into a pair of headphones. I guess my confidence was boosted by the fact that I work in a dubbing facility and that the maintenance guys would lend me a hand whenever I’d start crying. What follows is a sort of walkthrough more than a tutorial, I will be telling you what you should expect if you ever decide to open a pair of DT 770 (I imagine the M and the PRO are extremely similar…).
STEP 1. Remove the earpads. If you’re trying to access the cable you will obviously operate on the left earcup, where the cable actually goes…
STEP 2. Pop the dark grey plastic ring that is holding down the foam onto the driver’s block. I always thought the membrane was right behind the layer of foam. I accidentally poked at it a few times and always feared I would break them, but now I know it is protected by a thick plastic grid 🙂
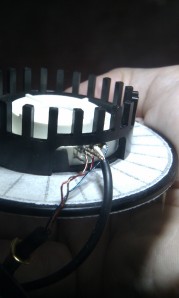
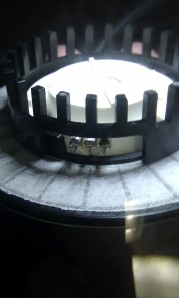
 STEP 3. Gently pull out everything. The driver’s block isn’t attached to the shell, it is merely held in place by the ring you just removed. The inside of the shell is padded with pieces of foam. In the left earcup, the headphones cable is soldered to the driver’s pins along with the cable that takes the signal to the second driver in the right earcup. This second cable had a fixed length so don’t pull on it, however you can try to push the main cable inside the ear cup and it should slide in so you can take the driver out from the shell completely and maybe lay it face down on your working surface.
Take a photo or write down the colours associations before you resolder the ground wire in place of the signal wire and get your phase all wrong.
 STEP 4. Unsolder. Note that the thin wires of the main cable (they’re not even coated, the insulator seems to be merely twisted around the core) are very difficult to solder back. I had someone help me with those. Another important thing to note is the two copper hairs forming loops under the soldering points. Apparently these are part of the coil, you do not want to temper with them, put solder or get your iron close to them. You merely need to operate on top of the contacts, not under them where these thin wires are.
STEP 5. Cut the cable accordingly (I decided to remove the slider thing and shorten the cable a lot, but that’s what I wanted) and put everything back together. Don’t forget to pass the cable through the hole in the shell before you re-solder and maybe you will need to put something around the cable inside the shell to stop it from sliding out. I used one of the Rilsan things below, and I’ll add a drop of glue later on (didn’t have it around when I operated) to give it a better grip on the cable :

Here you go, I fixed and customized my DT 770 M. The best thing is, I don’t find it affected the response (theoretically it should, considering my poor soldering skills…).
Thanks for this. I think I might need to invest in a iron
Bookmarked, this could save me. 🙂